I was recently fortunate to attend a series of workshops on sound engineering (Thank you Eric Heleno for the thought-provoking lectures and to James Oh for organizing an inspiring event). One concept discussed was the signal to noise ratio—keeping the sounds we want to hear while removing unwanted noise. Every cable, connection, mixer, and speaker can add noise or lose signal, and the final sound quality is only as good as the weakest link in this chain.
The workshops got me thinking that there is a similar chain of connections in our own body when we lead in tango. Just like the signal that passes from computer to speakers, our lead is a signal that passes through our body to be received by the follower. And similar to how FLAC files and expensive speakers can’t fix a faulty cable, our lead is only as clear as the weakest link in our internal chain.
So how can we have a high-fidelity lead? We lead through movement and muscle tone, and unwanted movement or muscle tone results in a noisy lead. Therefore, we want to go through each component in our internal chain and check if there is unnecessary movement or unneeded tension adding noise. I will share a useful way to segment the components of our internal chain, but it is just one way of many. It is the general process of looking component by component to remove unneeded movement or that matters.
We could consider each body part as the components and each joint as the connections. But for our purposes, it is useful to use a simpler framework. The four components I tend to consider are : (1) the legs, (2) the axis (hips, spine, and head), (3) the shoulder blades, and (4) the arms. We can imagine the signal path of our lead as passing from our feet, through our axis, shoulder blades, and arms, and being received in the embrace of our partner. Again, for each component we look at its movement (signal) and check if there is unneeded movement or tension (noise).
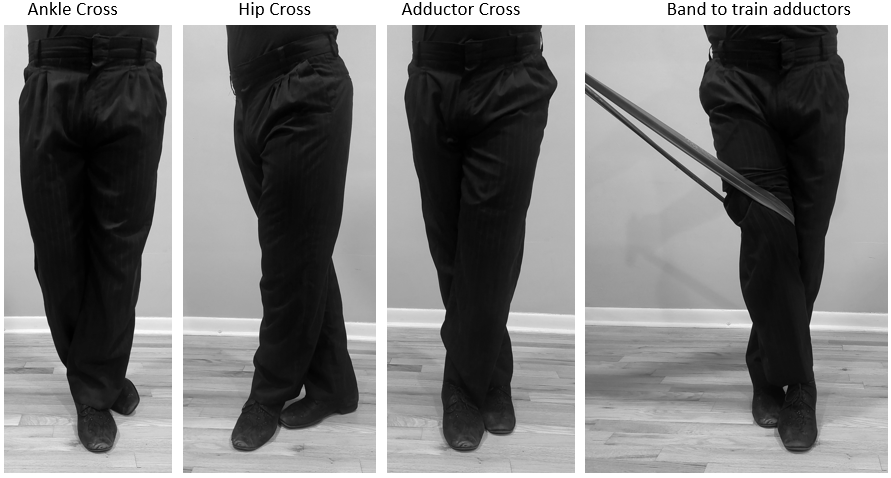
For the legs, we tend to not use the working leg enough and not release the free leg enough. Our working leg acts like an amplifier, so a weak working leg results in a weak signal. The axis consists of the hips, chest, and head stacked on top of each other. Our partner feels the movement of each of these blocks. Keeping the relative positions of the hip, chest, and head fixed (moving them the same amount) maintains a clear lead. And whenever they get out of alignment it adds noise to the lead. An unclear axis results in an unclear lead.
The signal of our lead passes from our axis to our partner through the shoulder blades. When the shoulder blades rise up on our back, it is like disconnecting an audio cable. All our partner hears is static. There is a triangle between the shoulders and our upper spine (picture the lines parallel to the floor). We want the spine vertex to be the point farthest from our partner, and we want to keep the shape of this triangle while dancing. Sometimes we step forward with our chest but leave the shoulder blades behind, or we move backwards with our shoulder blades without moving the spine; both cause the triangle to invert. The more this triangle moves, the more noise is added to the lead. The more stable the triangle of our spine to shoulders, the clearer the lead becomes.
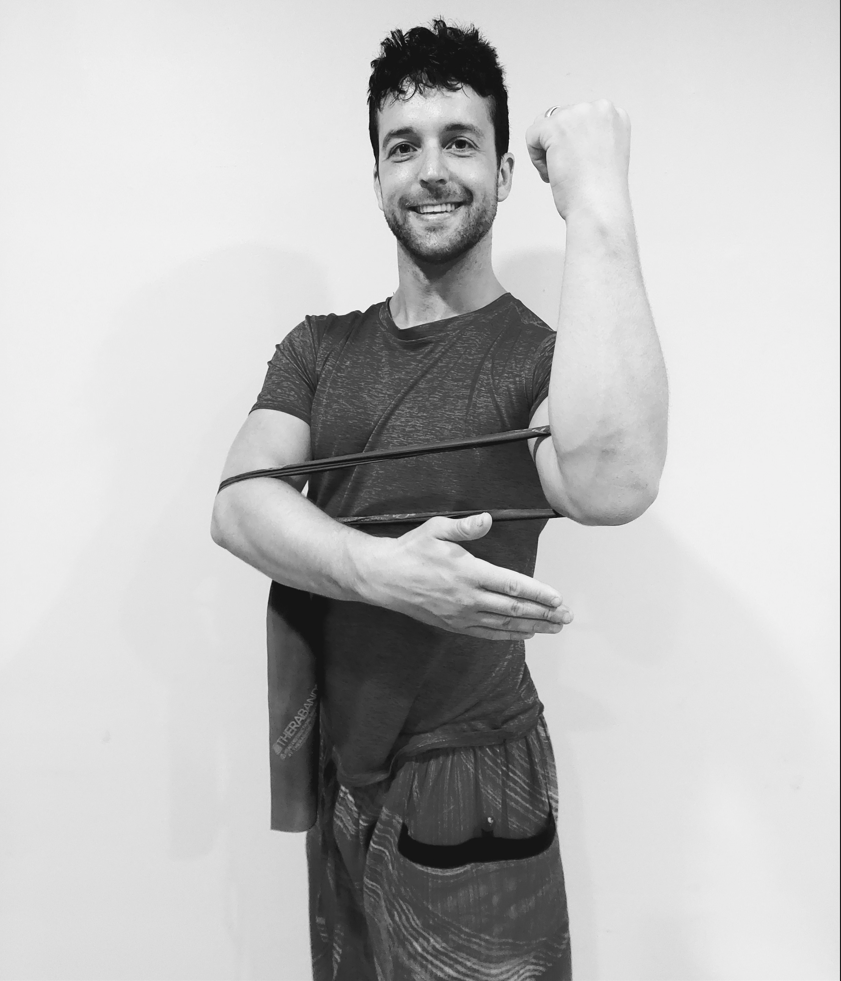
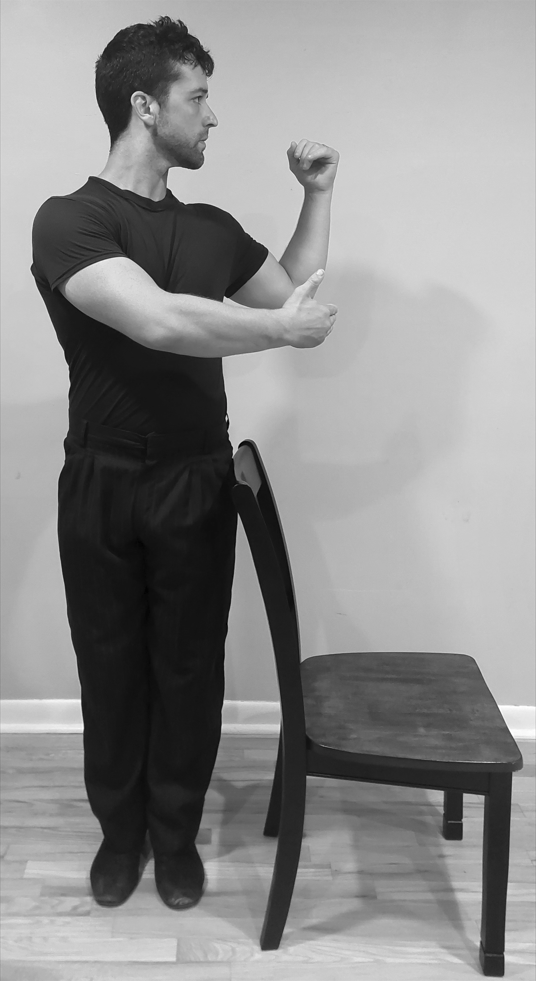
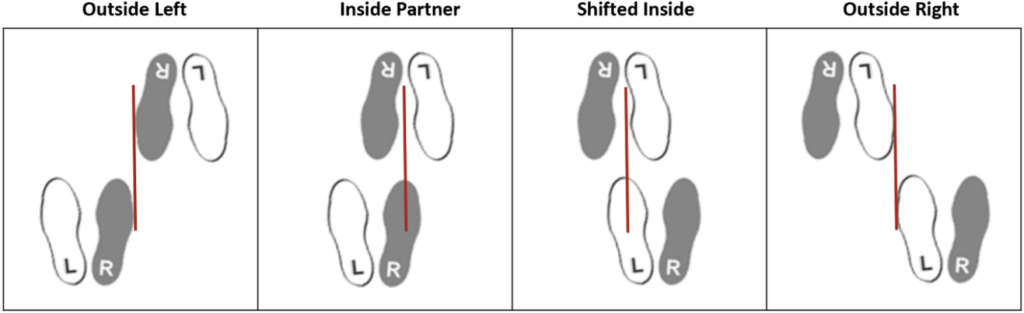
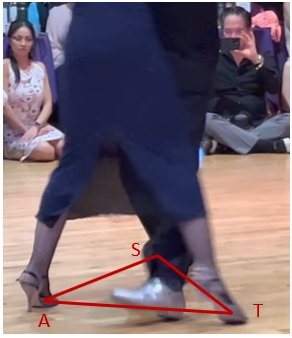
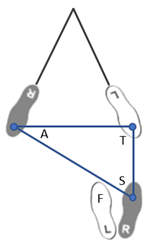
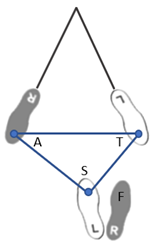
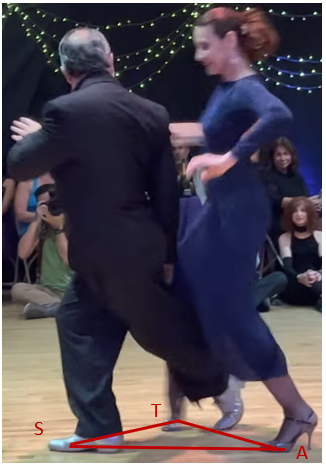
Finally, the arms are a major source of noise as they easily move too much and/or become overly tense. Our partner tunes into how our arms move for indications of the lead. Our elbows and our partner’s spine form another triangle that is important to maintain to have a high-fidelity lead. Warping the triangle between your elbows and your partner’s spine adds unwanted noise to the lead. Whether we pivot, lead a turn, or step outside partner, we want to keep the shape of this triangle the same.
I have been using the connections of a sound system as an analogy for how to lead clearly. But they are actually part of the same chain. A chain that starts with what producer Rick Rubin calls ‘The Source’, passing through the minds of the songwriter and composer. Through the fingers of the musicians into the sounds that are recorded, copied, digitized, and eventually downloaded onto the DJ’s computer. From the audio file through cables, DAC, mixer, and speakers to the sound waves picked up by our ears and processed by our brain. Our brain takes these audio inputs and comes up with movements that are passed through our body to form the lead, which, along with the music, is interpreted by the follower to produce movements in the dance. This dance connects into the feeling and flow of the milonga, which in turn connects to the state of being of the participants, which trickles out and feeds into the whole world. When we dance, we are a conduit from the original Source into the world. The quality of the signal that we pass on, and whether we pass on signal or just noise, depends on us.